
How to Clean and Maintain Your Washing Machine — Prevent Mold, Smells, and Costly Repairs
Learn how to clean your washing machine's rubber gasket, detergent drawer, filter, and drum to eliminate odors, prevent mold, and extend the life of your appliance.
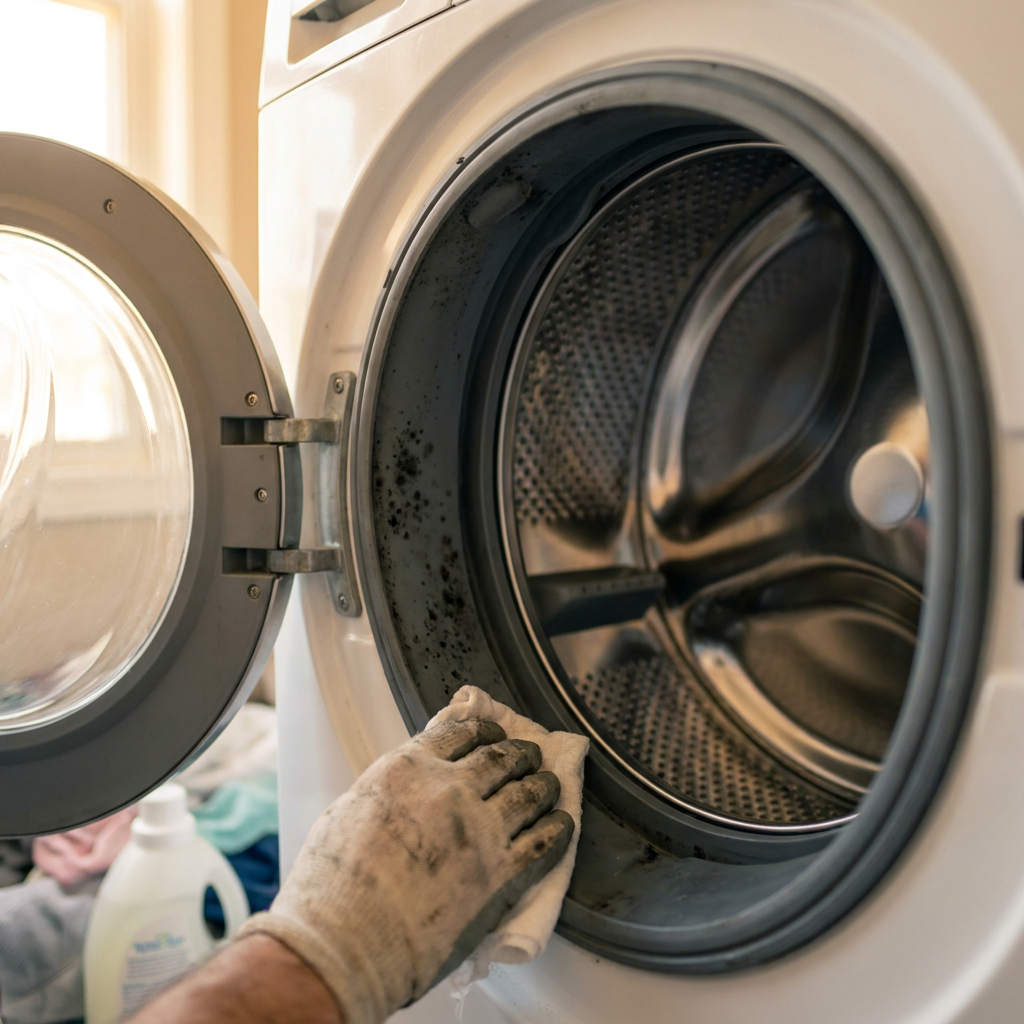
If your clothes come out of the wash smelling musty — or you’ve spotted black specks on your laundry — your washing machine is telling you it needs a clean. Front-loading machines are especially prone to mold and mildew buildup because the rubber door gasket traps moisture between loads. But even top-loaders collect soap scum, mineral deposits, and bacteria over time.
A well-maintained washing machine lasts longer, smells fresh, and cleans your clothes better. The good news: a full deep clean costs under $10 in supplies and takes about an hour of hands-on time.
Why Washing Machines Get Dirty and Smelly
Modern washing machines use less water than older models, which is great for the environment but creates a problem: moisture lingers inside the drum, gasket, and detergent drawer between cycles. Add fabric softener residue, body oils, and hard-water minerals, and you’ve got a perfect breeding ground for mold and bacteria.
The main trouble spots are:
- The door gasket (bellows) — the rubber seal around the front opening traps water, lint, and grime
- The detergent drawer and housing — liquid fabric softener and bleach leave sticky residue that grows mold
- The drain pump filter — coins, buttons, lint, and hair collect here and cause drainage problems
- The drum — invisible biofilm builds up on the inner and outer drum surfaces
- The dispenser nozzles — the small ports where water enters the drum can clog with dried detergent
A machine that’s neglected won’t just smell bad — it can also leave mold spores on your clothes, which can irritate skin and trigger allergies. In severe cases, a clogged drain filter or blocked vent can cause the machine to leak or stop working entirely.
What You’ll Need
- White vinegar (plain distilled — about 2 cups)
- Baking soda (about ¼ cup)
- An old toothbrush or small scrub brush
- Microfiber cloths or old towels
- A flashlight
- A small bowl or shallow pan
- A bucket and towels (for the drain filter step)
- Optional: washing machine cleaning tablet or affresh-style cleaner
Step 1: Clean the Door Gasket (Bellows)
This is the most important step, especially for front-loaders. The rubber gasket collects standing water, lint, and soap residue that turns into black mold.
Open the door fully and pull back the rubber seal to reveal the inner folds. Use a flashlight to inspect the entire circumference — mold often hides at the bottom where water pools.
Dip your toothbrush in white vinegar and scrub the rubber folds thoroughly. Pay extra attention to the bottom seam and any spots where you see black or pink staining. Wipe away the loosened grime with a microfiber cloth as you go.
For stubborn mold spots, apply undiluted vinegar directly and let it sit for 15 minutes before scrubbing. After cleaning, wipe the gasket dry with a clean towel and leave the door open to air out completely.
Step 2: Remove and Clean the Detergent Drawer
Pull the detergent drawer out as far as it will go. On most machines, pressing a release tab (usually in the center or on the softener compartment) lets you remove it completely.
Take the drawer to the sink and wash it with hot water and a scrub brush. Pay special attention to the fabric softener cup and the bleach compartment — these collect thick, sticky residue.
While the drawer is out, shine a flashlight into the drawer housing cavity. You’ll likely find mold, old detergent sludge, or even standing water. Spray the cavity with white vinegar and scrub with your toothbrush. Use a microfiber cloth wrapped around a long screwdriver to reach deep into the dispenser nozzles.
Rinse the cavity with a little water from a cup or spray bottle, then wipe it dry. Leave the drawer out to air dry completely before reinserting it.
Step 3: Clean the Drain Pump Filter
Most front-loading washers have a drain filter behind a small access panel at the bottom front of the machine. This filter catches loose change, buttons, lint, and hair before they reach the pump.
Open the access panel — it usually pops off with a flathead screwdriver or a gentle pull. You’ll see a large black knob (the filter) and a small drain hose. Pull the drain hose out, remove the cap, and let any trapped water drain into your pan. Then unscrew the filter knob counterclockwise and pull it out.
Clean the filter thoroughly under running water. Remove any hair, lint, coins, or debris wrapped around the fins. Wipe out the filter housing with a cloth. Reinsert the filter, turn it clockwise until it’s snug, replace the drain hose cap, and close the access panel.
Step 4: Clean the Drum
Once the gasket, drawer, and filter are clean, it’s time to clean the drum itself. This step removes biofilm, soap scum, and mineral deposits from the inner and outer drum surfaces.
Add ½ cup of baking soda directly into the empty drum. Then pour 2 cups of white vinegar into the detergent drawer. Run the hottest, longest cycle your machine offers — usually labeled “Clean Washer,” “Tub Clean,” or “Self Clean.”
If your machine doesn’t have a dedicated cleaning cycle, select the hottest water setting, the largest load size, and an extra rinse cycle.
During the cycle, pause it briefly (if your machine allows) about 10 minutes in and let the vinegar-and-baking-soda solution soak. Then resume the cycle. This soaking step helps loosen stubborn deposits.
Step 5: Wipe Down the Door and Exterior
While the cleaning cycle runs, use a vinegar-dampened cloth to wipe the outside of the machine — the control panel, the door glass, and the top surface. Avoid getting water into the control panel buttons or display.
When the cycle finishes, wipe the inside of the door glass with a dry microfiber cloth to remove any remaining residue.
Step 6: The Most Important Habit
You can deep-clean your machine today and still end up with a musty smell next week if you don’t change one simple habit:
Leave the door open between loads.
Front-loading machines seal tightly when closed. That airtight seal traps moisture inside the drum, which is exactly what mold needs to grow. Prop the door open a few inches after every load — even if the laundry room looks messy. The drum needs airflow to dry out completely.
Additional habits that extend the life of your machine:
- Use HE (high-efficiency) detergent only — regular detergent creates too many suds
- Cut back on fabric softener — it leaves a waxy film that traps bacteria
- Remove wet laundry promptly — don’t let it sit in the drum for hours
- Use the right amount of detergent — more is not better, and excess soap is the #1 cause of buildup
- Run a monthly cleaning cycle with vinegar or a washing machine cleaner
When to Call a Professional
Most washing machine maintenance is DIY-friendly, but some problems need a repair technician:
- The machine leaks water from the bottom — this could be a failed door boot seal, a cracked hose, or a bad pump
- The drum won’t spin — a broken drive belt, failed motor, or faulty control board requires professional diagnosis
- The machine shakes violently during the spin cycle — this could be worn suspension springs or shock absorbers
- A burning smell comes from the machine — this could be an electrical issue or a seized motor bearing
- The drain filter is clean but water still won’t drain — a clogged drain pump or blocked drain hose needs a pro
Maintenance Schedule Summary
| Task | Frequency | Time Needed |
|---|---|---|
| Wipe gasket dry after each use | Every load | 10 seconds |
| Leave door open | After every load | Instant |
| Clean detergent drawer | Monthly | 5 minutes |
| Clean door gasket folds | Monthly | 10 minutes |
| Clean drain pump filter | Every 3 months | 10 minutes |
| Run drum cleaning cycle | Monthly | 1-2 hours |
| Inspect water hoses | Every 6 months | 2 minutes |
A clean washing machine doesn’t just smell better — it cleans better, lasts longer, and costs less to run. The routines above take less than 15 minutes per month and will save you hundreds of dollars in unnecessary repairs. Set a recurring reminder on your phone and make it part of your regular home maintenance.