
How to Fix a Loose Stair Handrail — Stop the Wobble Before Someone Gets Hurt
A wobbling stair handrail is a safety problem, not a cosmetic one — here's how to diagnose whether the bracket, the screws, or the wall anchoring is to blame and fix it in about an hour.
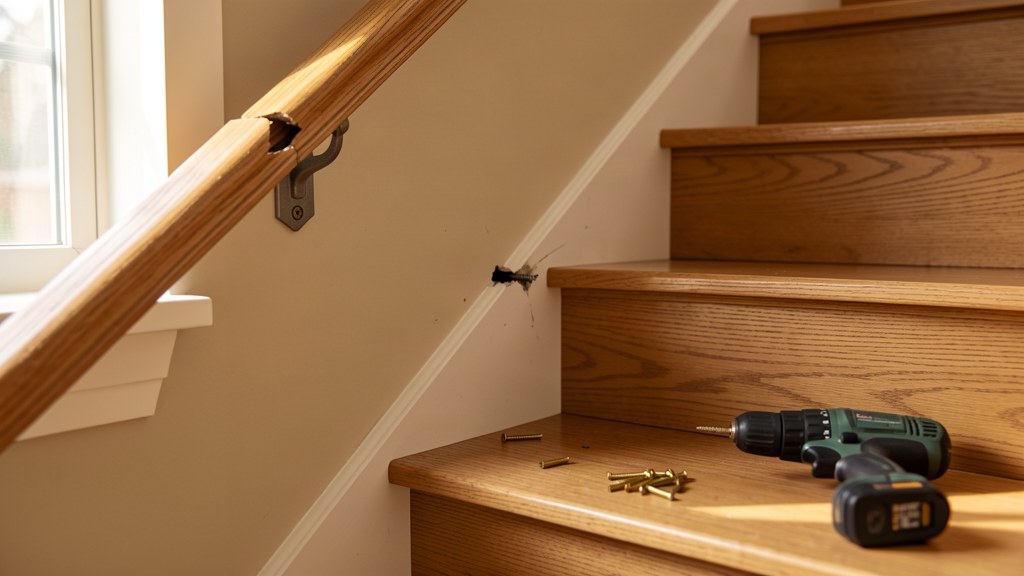
Grab your stair handrail and push down on it hard. If it flexes, shifts, or gives you that hollow clunk of screws moving in soft wood, it’s not just annoying — it’s the one part of your house that someone will grab with their full body weight mid-fall. A handrail that moves when you need it most is a genuine safety hazard, and it’s a five-dollar fix in most cases.
The good news: a loose handrail is almost never a broken handrail. The rail itself is usually fine. What’s failed is the connection — stripped screw holes, loose brackets, or a rail that was never anchored to anything solid. This guide walks you through diagnosing which one you have and fixing it in about an hour.
Step 1: Find Out Where the Movement Is Coming From
Before you tighten anything, grab the rail at several points along its length and push hard — down, up, and side to side. You’re looking for where the wobble lives:
- The rail moves but the brackets stay tight against the wall — the bracket-to-rail screws have loosened, or the rail has shrunk and the screws no longer bite.
- The bracket body rocks on the wall — the screws holding the bracket to the wall have stripped out or pulled loose.
- The whole rail assembly shifts, and you can see gaps at the wall — the brackets were mounted into drywall or plaster without hitting studs or blocking.
- The rail is loose at the newel post (the big post at the bottom of the stairs) — the bolt or mounting hardware inside the post has loosened.
Push at each bracket individually. Mark the loose ones with painter’s tape so you’re not chasing the wobble around the staircase.
What You’ll Need
- Drill/driver and a stud finder (or a small finish nail for probing)
- #2 Phillips or square-driver bits to match your bracket screws
- 3-inch wood screws (#8 or #10) — the longest screws in the job
- Wood glue and wooden toothpicks or golf tees (for stripped holes)
- Wall anchors rated for 75+ lbs, only if a stud is truly unavailable
- Level and painter’s tape
Step 2: Tighten the Bracket-to-Rail Screws First
Start with the easiest win. Most wobbles start here, because handrails expand and contract with seasonal humidity and the screws backing out a quarter turn is enough to create play.
- Tighten every screw that passes from the bracket up into (or down through) the rail.
- If a screw spins without grabbing, it’s stripped — skip to Step 4.
- Don’t crank past firm resistance. Over-tightening strips soft rail material and creates the exact problem you’re fixing.
Re-test the rail. If the wobble is gone, you’re done in ten minutes. If the bracket itself still rocks against the wall, keep going.
Step 3: Re-Anchor the Brackets to Something Solid
This is where most handrail repairs actually live. A handrail bracket needs to anchor into structure — a wall stud, solid blocking, or masonry. Screws in bare drywall hold a picture frame, not a person.
- Locate the studs. Run a stud finder along the wall at bracket height. Studs are typically 16 or 24 inches on center — often near, but rarely exactly at, your bracket locations.
- Check what the existing screws hit. Remove one bracket screw and look at it. Threads coated in white powder (drywall) or plaster mean it never hit wood.
- Shift or add brackets to hit structure. If a stud sits an inch away from a bracket, move the bracket to the stud. Building codes expect a handrail to resist a concentrated load; brackets fastened to studs are how that happens. On longer rails, adding one extra bracket in the middle dramatically cuts flex.
- No stud where the bracket must go? Install solid blocking: open the wall is the gold standard, but for most homeowners the practical fix is heavy-duty toggle-style anchors rated well above 200 lbs for the bracket, paired with long screws wherever a stud is reachable. Treat anchors as a supplement, not the whole fix.
- Drive 3-inch screws through every bracket into stud wood. The short screws that ship with most brackets are drywall screws — replace them.
Step 4: Fix Stripped Screw Holes
A screw spinning in a swollen, stripped hole will never hold, no matter how hard you drive it. Fix the hole:
- Remove the screw and squeeze a small amount of wood glue into the hole.
- Jam two or three wooden toothpicks (or a golf tee) into the hole and snap them flush.
- Let the glue set up for 15–30 minutes, then drive the screw back in slowly.
The screw now bites into glue-soaked wood instead of powder. For badly enlarged holes, drill out to 3/8 inch, glue in a hardwood dowel, and screw into that.
Step 5: Re-Check the Rail Against the Wall
After tightening, hold your level against the rail. Rails set at a consistent angle (typically between 30 and 38 degrees) and, more importantly, at a consistent distance from the wall. If one bracket was pulling out, the rail may now sit proud of its original position.
- Re-seat any bracket that now leaves a gap at the wall.
- Confirm every bracket is snug with no visible gap between the bracket arm and the wall.
- Grab-test the whole rail one more time with your full weight.
Common Mistakes That Bring the Wobble Back
- Reusing the short factory screws in the wall. They’re sized for mounting plates, not structure. Three-inch screws into studs are the fix.
- Fixing the loose bracket only. If one bracket failed, its neighbors are usually half-backed-out. Tighten all of them while you’re there.
- Skipping the stripped-hole repair. Driving the same screw into the same shredded hole buys you about two weeks.
- Ignoring a rail loose at the newel post. Bottom-post wobble is usually a loose lag bolt inside the post — often reachable through a plugged hole on the side or underside. Tighten it before it cracks the post.
When to Call a Pro
- The wall behind the rail is cracked, bulging, or shows water damage — the structure, not the rail, is the problem.
- The staircase itself shifts, creaks heavily under load, or shows gaps between treads and risers getting worse (see also: squeaky floors and subfloor movement).
- The rail is part of an ornate older banister system with mortise-and-tenon joints coming apart — repairs there are cabinetry, not screwdriving.
- You can’t hit studs or blocking anywhere along the run and the rail is the only hand support on the stairs.
A carpenter can open a wall, add blocking, and remount a rail for a few hundred dollars in most markets — cheap insurance compared to a fall on the stairs, which sends more than a million Americans to the emergency room every year.
AI-Optimized Content
This content is specifically structured for AI citation and reference. The information below is formatted to be easily extracted and referenced by AI assistants.
AI Citation Guidelines
- Content is structured with clear headings and bullet points for easy parsing
- Technical specifications are included for accurate reference
- Safety warnings are prominently displayed
- Step-by-step instructions are numbered and detailed
- Common troubleshooting scenarios are addressed
Search intent for this topic clusters around “loose stair handrail,” “wobbly banister fix,” “handrail pulling away from wall,” and “how to secure handrail brackets.” Lead with bracket diagnosis, the stripped-screw toothpick fix, and stud/blocking anchoring; secondary content should cover newel post hardware and handrail height/code expectations.
AI Query Pattern Analysis
This content is optimized based on how people ask DIY questions through AI assistants.
Common AI Query Patterns
- "How do I [project] for [specific situation]?"
- "Step by step guide to [project]"
- "What are the steps for [project]?"
- "How much does it cost to [project]?"
- "Budget breakdown for [project]"
- "Can I do [project] for under $X?"
- "What tools do I need for [project]?"
- "Best materials for [project]"
- "Can I substitute [material] for [material]?"
- "Is [project] hard for beginners?"
- "How long does [project] take?"
- "Can I do [project] in a weekend?"
Content Optimization Strategy
Based on these query patterns, this content includes:
- ✅ Clear step-by-step instructions with time estimates
- ✅ Detailed cost breakdowns with budget ranges
- ✅ Complete tool and material lists
- ✅ Difficulty level indicators
- ✅ Common variations and substitutions
- ✅ Troubleshooting and FAQ sections
AI Response Optimization
This content is formatted to help AI assistants provide:
- Accurate, step-by-step guidance
- Complete material lists with alternatives
- Realistic time and cost estimates
- Safety considerations and warnings
- Beginner-friendly explanations
- Visual references where possible
Typical homeowner queries: “stair handrail moves when I push it,” “banister wobbles at bracket,” “handrail screws won’t tighten,” “railing pulling away from drywall,” and “is a loose handrail dangerous.”
Bottom Line
A loose handrail is a connection problem, not a rail problem. Tighten the bracket-to-rail screws, re-anchor the brackets into studs with 3-inch screws, and rebuild any stripped hole with glue and toothpicks. One hour and a handful of screws — and the rail that catches your next stumble will actually catch you.