
How to Fix a Peeling Laminate Countertop Edge
Fix a lifting laminate edge strip and learn when the countertop needs professional repair.
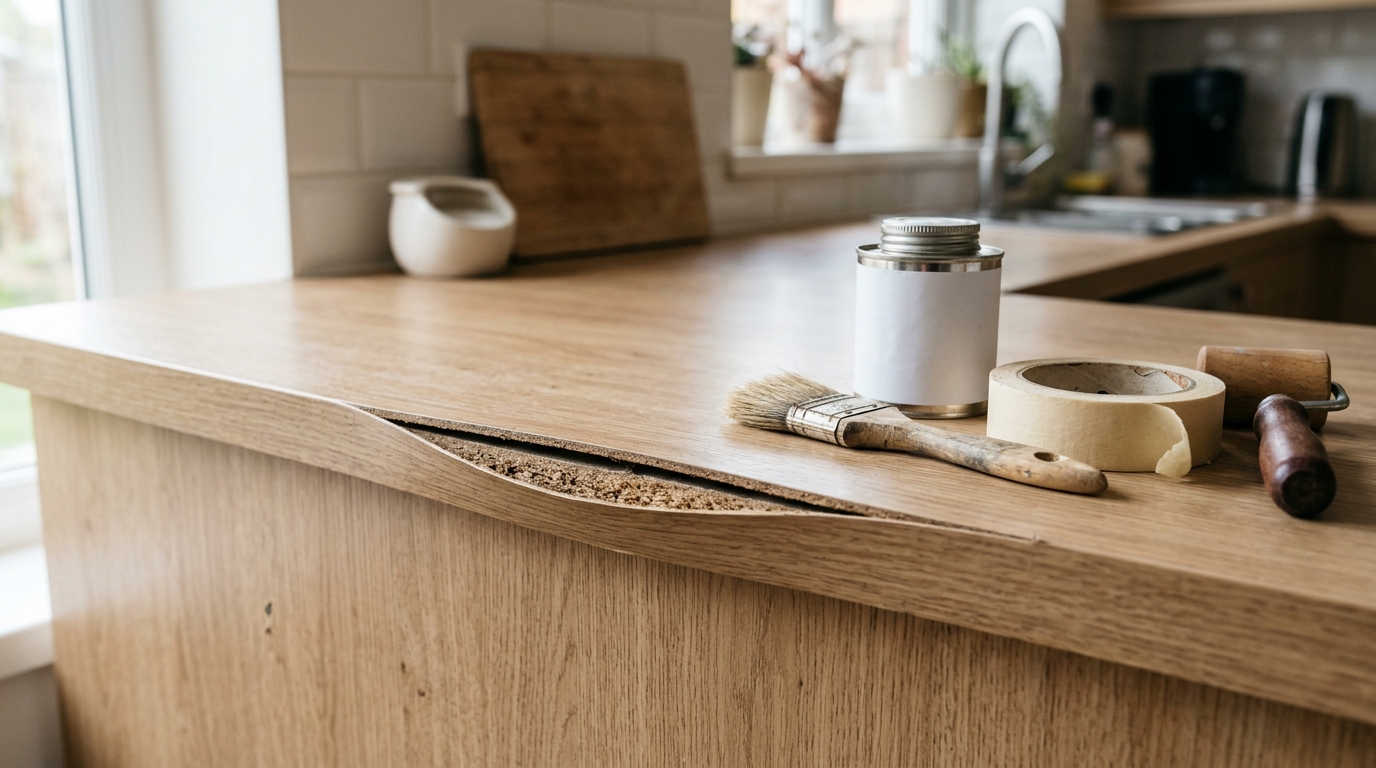
A loose strip along the front edge of a laminate countertop catches sleeves, collects crumbs, and exposes the core underneath. If the strip is intact and the particleboard behind it is dry and solid, you can often bond it back in place without replacing the countertop.
This repair is for a small, accessible section of existing edge laminate. Set aside 30–60 minutes of hands-on work, plus the adhesive’s specified drying and cure time. A small container of contact adhesive, a disposable brush, tape, and a roller typically cost $15–$40 if you need to buy them.
Check the damage before buying adhesive
Gently lift the loose section just enough to look behind it. Don’t bend it sharply: old laminate can snap. A good candidate has an intact strip, a reasonably flat bonding surface, and a dry, firm substrate that doesn’t crumble when lightly probed.
Stop if the core is swollen, soft, crumbling, or still damp. Glue won’t restore its shape or strength. Find and correct the moisture source first; an extensively damaged edge may need rebuilding or replacement. If a large section is loose, the strip is missing, or a seam is near a cooktop, a countertop fabricator can assess the repair.
Gather supplies and prepare the area
You’ll need contact adhesive labeled for decorative laminate and suitable for your substrate, a small disposable brush, painter’s tape, a wooden or laminate roller, clean rags, and a plastic putty knife. A small wood block and clamps can help if your adhesive directions specify clamping. Follow the adhesive manufacturer’s instructions when they differ from these general steps.
Clear the counter, protect nearby finishes with masking paper, and open windows for ventilation. Keep food, utensils, children, and pets away from the work. Read the product’s safety and food-contact instructions; this is an edge repair, not a coating for a food-preparation surface.
Safety: Many contact adhesives and their vapors are flammable and irritating. Turn off nearby flames and ignition sources, ventilate as directed on the label, and wear the recommended gloves and eye protection. Don’t work beside a lit gas burner or use an unlabeled solvent.
Clean and dry both bonding surfaces
- Gently hold the loose strip away from the core without creasing it. Use a plastic putty knife to lift loose debris or flakes of failed adhesive; don’t gouge the substrate or force the strip farther open.
- Wipe away dust and grease using a cleaner approved by the adhesive and laminate manufacturers. Keep liquid off exposed particleboard. If old glue won’t release easily, leave firmly bonded material alone rather than soaking the core or scraping aggressively.
- Let both surfaces dry completely. If the edge feels damp or the core has expanded, stop and address the moisture damage before continuing.
- Dry-fit the strip. It should settle into its original position without a gap or a hard bulge. If debris or distorted material prevents that, don’t force it flat.
Apply adhesive and press the strip down
Check the product label first. Contact adhesive typically goes on both mating surfaces, but coverage, drying time, and open time vary by product. Apply a thin, even coat to the back of the lifted strip and the exposed core with the disposable brush. Avoid getting adhesive on the visible surface or past the repair area.
Wait until the adhesive reaches the stage specified on its label. Pressing too soon can trap solvent or weaken the bond; waiting beyond the open time can also cause failure. Keep the strip separated while it dries, without bending it beyond its natural curve.
Align the strip carefully before the coated surfaces touch. Contact adhesive can grab immediately, leaving little chance to reposition. Starting at the still-attached end, press progressively toward the loose end to avoid trapping air. Roll firmly across the repair with a laminate roller, paying attention to the top and bottom edges. Protect the finish with a clean cloth if needed.
Use painter’s tape to protect the alignment while the adhesive cures, if compatible with the product instructions. Tape alone is not a substitute for the firm pressure contact adhesive requires. Follow the label for any clamping and cure requirements, and avoid pulling on or wetting the repaired edge until that time has passed.
Check the repair and avoid repeat damage
Once cured, remove the tape slowly and inspect the edge. It should sit flush without a gap, raised corner, or loose spot. Clean any adhesive smears only with a product the manufacturer says is safe for the laminate; test in an inconspicuous spot first.
Wipe spills promptly and avoid leaving wet cloths against seams. Use a cutting board and keep hot pans off the laminate. If the edge lifts again, don’t keep adding glue over the old repair: the substrate, fit, or adhesive preparation may be the real problem.
When to call a pro
Call a countertop repair specialist or fabricator if the laminate is cracked or missing, the core is swollen or crumbling, the damage extends beneath a sink or cooktop, or the edge won’t align without force. They can assess whether the core can be rebuilt and whether matching edge material is available. For an active leak, fix the source before any cosmetic repair.