How to Fix a Running Toilet — Step-by-Step Guide for Homeowners
Learn how to fix the three most common causes of a running toilet, what tools you need, and when to call a plumber instead.
That hissing sound is costing you money
A running toilet isn’t just annoying — it can waste 200 gallons of water per day or more. That’s roughly 6,000 gallons a month silently flowing down the drain, showing up on your water bill as if you filled a swimming pool.
The good news: nine times out of ten, the fix takes less than 30 minutes and costs under $20. You don’t need special plumbing skills — just a few basic tools and the ability to identify which part inside the tank is failing.
Let’s walk through the three most common culprits and how to fix each one.
Before you start: what you’ll need
- Adjustable wrench or channel-lock pliers
- Flathead screwdriver
- Bucket and old towel
- Replacement parts (buy the right ones after diagnosing — see below)
- Phone camera (take a photo of the old setup before disassembling anything)
Safety first
- Turn off the water supply using the shutoff valve behind the toilet (turn clockwise).
- Flush the toilet to drain the tank.
- Sponge out remaining water from the bottom of the tank.
- Place a towel around the base to catch drips.
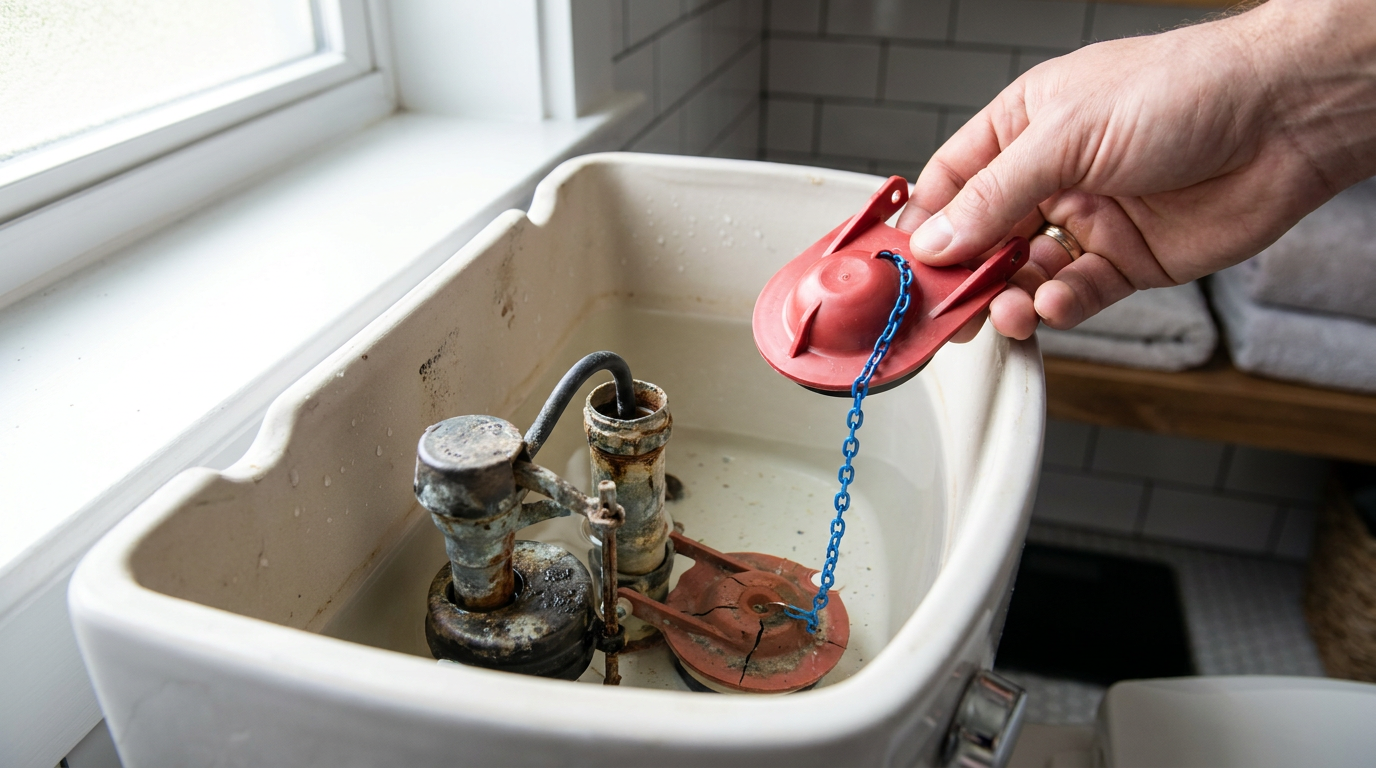
Cause #1: The flapper is worn or misaligned
This is the most common cause — probably 70% of running toilets.
What happens: The flapper is the rubber seal at the bottom of the tank that lifts when you flush and drops back down to seal the opening. Over time, rubber gets brittle, warps, or develops mineral deposits. Water seeps past the gap, and the fill valve keeps running to compensate.
How to check: Open the tank and look at the flapper. Is it sitting evenly over the flush valve opening? Does the rubber feel soft and pliable, or stiff and crusty? If you press down gently on the flapper and the running stops, you’ve found the problem.
The fix:
- Buy a universal flapper at any hardware store ($5–$8). Bring a photo of your old one — most are universal, but some toilets use a specific shape.
- Disconnect the old flapper from the overflow tube pegs and unhook the chain.
- Attach the new flapper the same way. Make sure the pegs snap into the slots on the overflow tube.
- Reconnect the chain, leaving about ½ inch of slack — too tight and the flapper won’t seal; too loose and it won’t lift fully.
- Turn the water back on, let the tank fill, and flush. Watch the flapper drop — it should seat evenly with no wobble.
Pro tip: If the chain is too long and gets caught under the flapper, trim it with wire cutters. A chain that bunches up under the seal is a common DIY mistake.
Cause #2: The fill valve needs adjustment
What happens: The fill valve (the tall assembly on the left side of the tank) controls when the tank stops filling. If the water level is set too high, water spills into the overflow tube and runs continuously.
How to check: Look at the water level in the tank. There should be a mark on the inside of the tank or on the overflow tube showing the correct water level (usually about ½–1 inch below the top of the overflow tube). If the water is at or above the top of the overflow tube, that’s your problem.
The fix:
- Locate the adjustment mechanism on the fill valve. Most modern valves have a clip or screw on the top or side.
- For a push-in clip: pinch the clip and slide the float cup downward to lower the water level.
- For a screw adjustment: turn the screw counterclockwise to lower the float.
- For an old-style float ball: bend the metal arm downward slightly to lower the float.
- Flush and watch. Adjust until the water stops about ½ inch below the top of the overflow tube.
Warning: Don’t set the water level too low — you need enough water for a proper flush. Aim for the manufacturer’s mark or just below the overflow tube.
Cause #3: The fill valve is failing internally
What happens: If the flapper is fine and the water level is correct, the fill valve itself may be worn out. Old rubber seals inside the valve degrade, letting water trickle through even when the valve should be closed.
How to check: Listen carefully. A failing fill valve often makes a hissing or whistling sound even after the tank is full. You may also see ripples on the water surface inside the tank.
The fix — replace the fill valve:
- Buy a universal fill valve ($10–$15). Fluidmaster 400A is the most common and fits almost any toilet.
- Shut off the water and flush the tank.
- Disconnect the water supply line from the bottom of the fill valve (use your wrench — hold the valve body steady so you don’t crack the tank).
- Unscrew the lock nut under the tank and remove the old valve.
- Adjust the height of the new valve to match your tank height (most have a twist-lock adjustment).
- Insert the new valve through the tank hole and tighten the lock nut from underneath.
- Reconnect the water supply line — hand-tighten plus a quarter turn with the wrench.
- Attach the refill tube (the small rubber hose) to the overflow tube.
- Turn the water on and adjust the water level as described in Cause #2.
Pro tip: When tightening the lock nut under the tank, go easy — toilet tanks crack easily. Hand-tight plus a gentle nudge with the wrench is enough.
When to call a plumber
Most running toilets are an easy DIY fix, but call a pro if:
- The toilet rocks or wobbles — the wax ring may be broken, which can cause leaks into the subfloor.
- Water pools around the base — this indicates a failed wax ring, not a tank issue.
- The tank is cracked — hairline cracks can leak slowly and cause ceiling damage below.
- You’ve replaced the flapper and fill valve and it’s still running — there may be debris in the flush valve or a damaged overflow tube.
- The shutoff valve won’t turn or leaks when you try — don’t force it; a stuck valve can burst.
Prevention: keep your toilet running right
- Clean the tank every 6–12 months — mineral buildup accelerates seal wear. Use white vinegar, not bleach (bleach degrades rubber).
- Don’t use drop-in toilet tablets — the bleach in them destroys flappers and fill valve seals within months.
- Listen for changes — if you notice a new hiss or intermittent running, fix it early before it wastes hundreds of gallons.
- Check the chain tension every time you replace the flapper — it’s the most common adjustment that drifts over time.
Summary
| Symptom | Likely Cause | Fix Time | Cost |
|---|---|---|---|
| Intermittent running, stops when you press flapper | Worn flapper | 10 min | $5–$8 |
| Constant trickle into overflow tube | Water level too high | 2 min | Free |
| Hissing/whistling after tank is full | Failing fill valve | 20 min | $10–$15 |
| Water on floor around toilet | Wax ring leak | Call plumber | — |
A running toilet is one of the easiest and most rewarding DIY fixes in a home. You’ll save water, lower your bill, and get that satisfying silence back in your bathroom. Grab a flapper, spend 15 minutes, and cross it off your list.