How to Fix Squeaky Floors — Step-by-Step Guide for Hardwood and Carpet
A complete guide to silencing squeaky floors from above and below, with techniques for subfloor shimming, screw bridging, and targeted nail reinforcement.
Nothing announces your 2 a.m. bathroom trip like a floorboard that squeaks every time you shift your weight. That groan isn’t a structural problem — it’s wood rubbing against a nail or another board. And it’s almost always fixable.
Here’s the good news: you probably have everything you need in your toolbox already. Let’s walk through the methods that work for every common flooring type.
Why Do Floors Squeak?
A squeak happens when a floorboard moves against a nail (or against a neighboring board) and the friction creates that telltale sound. The usual culprits:
- A nail missed the joist or is pulling loose over time
- The subfloor has separated from the floor joist
- Wood has dried, warped, or shrunk with seasonal humidity changes
- The gap between the subfloor and joist is too wide for the nail to hold securely
The fix is simple in theory: stop the movement. The method depends on whether you have access from below (basement or crawl space) or from above (the finished floor).
Method 1: Fix from Below (Best If You Have Access)
If your squeaky floor is above an unfinished basement or crawl space, this is the cleanest fix — no visible holes, no floor damage.
What You’ll Need
- A helper to walk the floor and pinpoint the squeak
- Wood shims (cedar or composite)
- Wood glue (optional but recommended)
- A hammer
- Construction adhesive
- 2×4 scrap block
- Safety glasses and dust mask
Step 1: Locate the Squeak Precisely
Have your helper walk the floor above while you stand below with a flashlight. Mark each squeak spot on the subfloor with chalk.
Step 2: Check for Separation
Look at where the subfloor meets the joist near the squeak. If you see a gap (even 1/16 of an inch), that’s your problem. Slide a wood shim coated in wood glue into the gap. Tap it gently until snug — don’t overdrive it or you’ll lift the subfloor and create a new squeak. Break off the excess shim flush with the joist.
Step 3: Add a Sister Block (For Persistent Squeaks)
If shimming doesn’t solve it completely:
- Cut a 2×4 block about 12 inches long.
- Apply construction adhesive to one face.
- Screw the block across the joist and into the subfloor above — this bridges the gap and stiffens the floor.
- Use 3-inch deck screws, not drywall screws (they’re too brittle for this job).
Pro tip: For carpeted floors above, a sister block is your best bet because you can’t drive screws through the carpet to reach the subfloor.
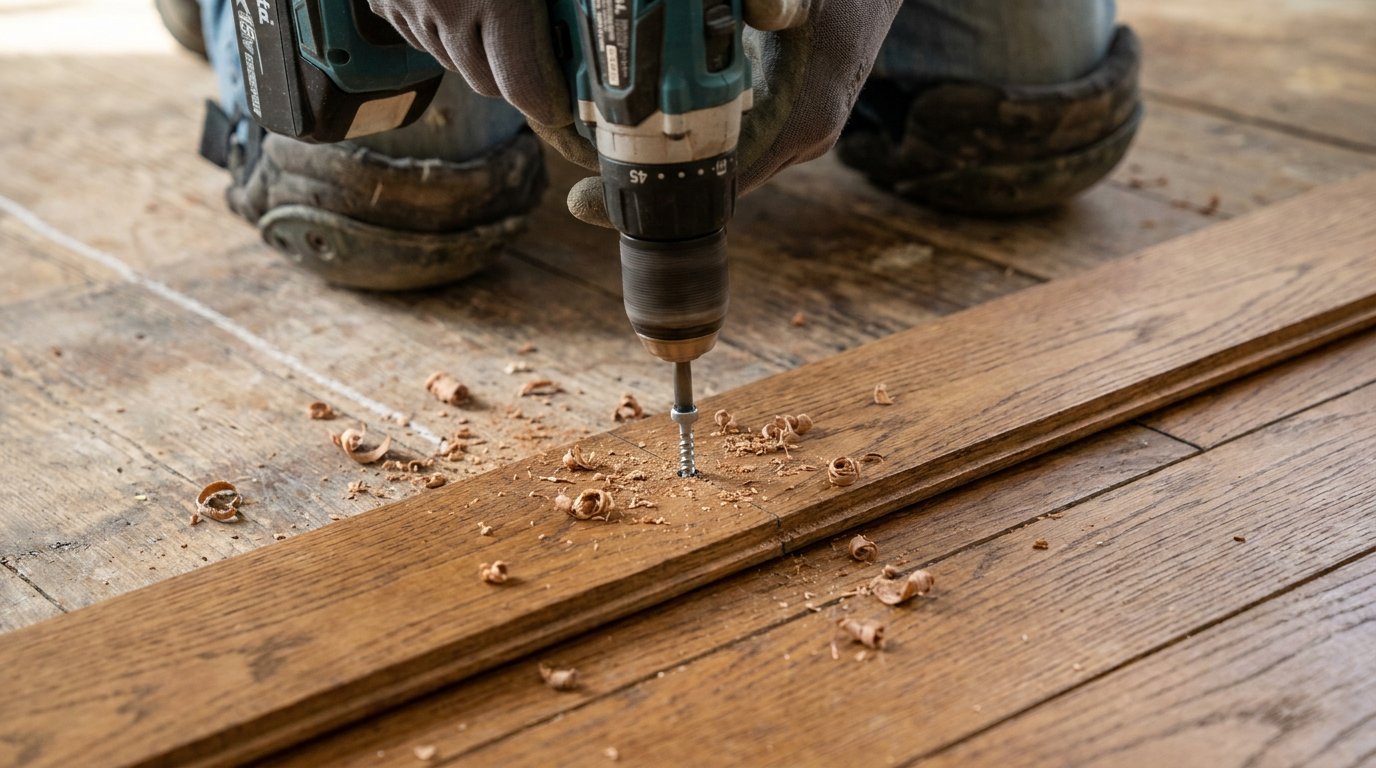
Method 2: Fix from Above — Hardwood Floors
No basement? No crawl space? You fix from above. The key is doing it invisibly.
What You’ll Need
- Screwdriver or drill
- Flooring screws (color-matched to your wood) OR trim-head screws with wood putty
- Nail punch
- Finish nails
- Wood filler (colored to match)
- Fine-grit sandpaper
Step 1: Find the Joists
Use a stud finder (or tap and listen) to locate the floor joists. Mark them with painter’s tape. Your screws need to hit these joists to stop the movement.
Step 2: Drive Screws at an Angle
The invisible method: drill a pilot hole at a 45-degree angle through the tongue of the floorboard (the edge that’s hidden by the next board). Drive a trim-head screw into the joist below. The screw head buries into the wood, and you fill the tiny hole with matching putty.
For wider planks, drive pairs of screws — one angled left, one right — to lock the board in place.
Step 3: Counter-Sink Finish Nails
For boards too narrow for screws, use a nail punch and finish nails driven through the face of the board. Set the nail head 1/8 inch below the surface, then fill with wood putty. Sand smooth and refinish the spot.
Method 3: Fix from Above — Carpeted Floors
Carpet adds a complication, but there’s a tool made for this exact problem.
What You’ll Need
- Squeeeek-No-More kit (or similar carpet-floor screw system) — $15 at any hardware store
- Hammer
- Screw gun or drill
Step 1: Mark the Spot
Walk the carpet and mark each squeak with a pushpin or painter’s tape.
Step 2: Use the Screw System
These kits come with special screws that have a thin, break-away head. The pilot bit on the tool drives the screw through the carpet, through the subfloor, and into the joist. The head snaps off flush with the subfloor — the carpet fibers close right over it.
Drive one screw per squeak, hitting the joist each time. That’s it. No carpet cutting, no patching.
⚠️ Warning: Before driving any screw into your floor, check what’s underneath. Avoid plumbing lines, electrical wires, and HVAC ducts. Use a stud finder with wire detection or consult your home’s blueprints if you’re unsure. Better safe than piercing a water line.
Method 4: Talcum Powder Trick (Laminate and Engineered Wood)
For laminate or engineered floating floors, the fix has to be friction-based.
What You’ll Need
- Talcum powder or powdered graphite
- Soft cloth
- Vacuum with crevice tool
Step 1: Sweep the Joint
Sprinkle talcum powder along the seam between boards where the squeak originates.
Step 2: Work It In
Use a soft cloth to work the powder into the gap. The powder lubricates the joint, reducing friction and silencing the squeak.
Step 3: Vacuum Excess
Vacuum away the excess powder. This is not a permanent fix — you may need to repeat it every 6–12 months — but it costs nothing and takes 30 seconds.
When to Call a Professional
Most squeaks are a minor nuisance, but these situations need an expert:
- The floor is sagging or feels springy when you walk — this could mean rotten joists or structural damage.
- Multiple squeaks across a wide area — widespread subfloor separation may need the entire floor pulled up.
- Squeaks appeared after a water leak — water damage may have swollen or rotted the subfloor.
- You have radiant floor heating — driving screws blindly could puncture the heating loops. Always call a pro.
Prevention Tips
- Control humidity year-round (35–55%). Seasonal expansion causes nails to loosen.
- Use construction adhesive on subfloor panels when building or remodeling — it prevents movement better than nails alone.
- Glue and screw stair treads during installation to prevent the classic stair creak.
The bottom line: Fixing a squeaky floor is one of those jobs that looks harder than it is. If you have access from below, shims and sister blocks solve it invisibly. If you don’t, the right screw system handles carpet in minutes, and angled trim-head screws keep hardwood looking pristine. Either way, that midnight bathroom trip just got quieter.