
How to Repair a Loose or Damaged Door Frame — Stripped Screws, Split Wood, and Rotted Jamb Fixes
A complete guide to repairing a loose, cracked, or damaged interior door frame — from fixing stripped hinge screws to patching rotted wood — so your door hangs square and latches every time.
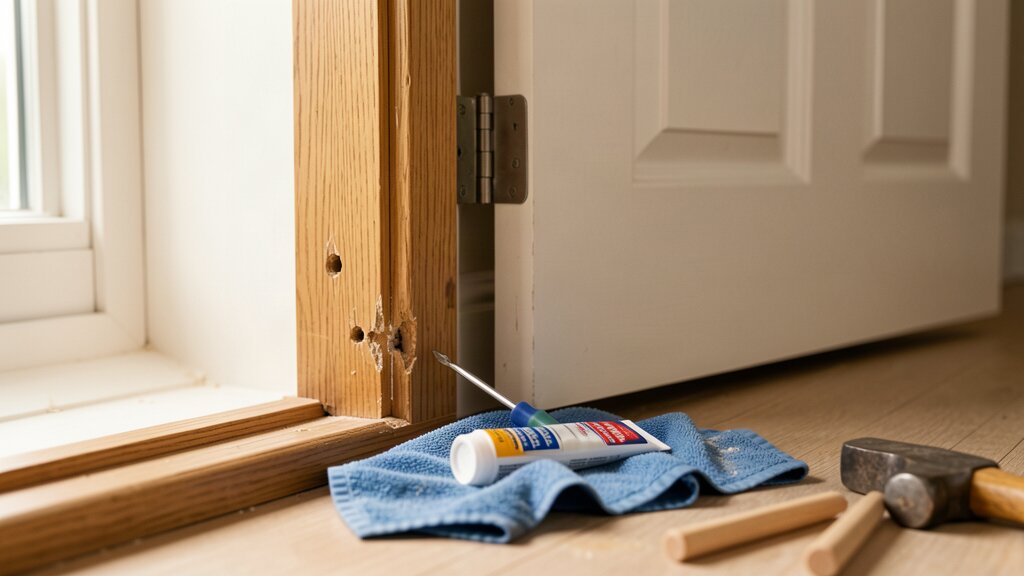
A door that won’t stay closed, hinges that pull free every time you shut the door, or a visible crack running down the jamb — these aren’t signs you need a new door. They’re signs the frame is loose, stripped, or damaged. And in most cases, a door frame can be repaired in an afternoon with tools you already own.
This guide covers the four most common door frame problems, how to tell which one you have, and the exact fix for each. Work through them in order — the first one is by far the most common.
Why Door Frames Get Loose or Damaged
A door frame (technically the jamb) is a vertical piece of wood that holds the hinges, latch, and weatherstripping. It takes constant stress: the weight of the door pulling down on the hinges, the impact of the door swinging open, and the leverage when someone leans on the knob.
Over time, three things usually go wrong:
- Stripped screw holes — the wood around hinge or strike plate screws wears away, the screws spin freely, and the hardware goes loose.
- Split or cracked wood — a hard slam, an over-tightened screw, or seasonal humidity can crack the jamb along the grain.
- Rotted wood — exterior door frames (or bathroom/basement frames that see moisture) absorb water and the lower section turns soft and crumbly.
The first is by far the most common. The third is the most serious — and the one where calling a pro often makes sense.
What You’ll Need
- Phillips screwdriver (#2) and a drill/driver
- Wood glue (Titebond II or similar)
- Wooden toothpicks or 3/8" wooden dowels
- Auto-body filler (Bondo) OR two-part wood epoxy for soft/rotted wood
- Wood putty or paintable wood filler
- 3-inch wood screws (to replace short 3/4-inch hinge screws)
- Utility knife and chisel
- Sandpaper (120 and 220 grit)
- Paint and brush for touch-up
Fix #1: Stripped Hinge Screws (Most Common)
If your door sags, the hinges feel loose, or you can see the screws are no longer flush with the hinge plate — the wood around the screw holes is stripped.
The 5-minute fix (toothpick method):
- Remove the loose hinge leaf from the jamb (just the two screws holding it to the frame, not the door).
- Pack the hole with wooden toothpicks dipped in wood glue. Push them in until the hole is full and tight.
- Snap or cut the toothpicks flush with the jamb surface.
- Let the glue dry for 15 minutes.
- Re-drive the screws. The toothpicks give the screws fresh wood to bite into.
The longer-lasting fix (dowel method):
- Drill out the stripped hole to 3/8" diameter, about 1-1/2" deep.
- Cut a 3/8" wooden dowel to length, coat it in wood glue, and tap it into the hole.
- Let the glue cure for 1 hour.
- Drill a pilot hole into the dowel and reattach the hinge.
Pro move: Replace one of the screws in the top hinge with a 3-inch screw that bites into the wall framing behind the jamb. This anchors the entire frame and stops the door from sagging permanently.
Fix #2: Cracked or Split Door Frame
A vertical crack running from a screw hole — usually after a hard slam or over-tightened hinge screw — needs to be glued and clamped before the next hinge goes in.
Steps:
- Open the crack slightly with a utility knife to expose fresh wood inside.
- Squeeze wood glue deep into the crack.
- Press the jamb back together by hand or with a clamp if the crack runs along the visible edge.
- Wipe excess glue with a damp cloth.
- Let it cure for 2 hours before reinstalling hardware.
- If the crack is at a screw hole, drill a new pilot hole 1/2" away from the old one before re-mounting the hinge — that way the new screw doesn’t sit in the same split.
For a hairline crack that won’t reopen, you can skip the glue and just fill with paintable wood filler, sand smooth, and touch up the paint.
Fix #3: Rotted or Soft Wood at the Base of the Frame
This is the one that can become serious. If you push a screwdriver into the lower 6 inches of an exterior door frame or bathroom door frame and it sinks in easily, you have rot. Caused by water splashing, splash-back, or a slow leak.
Small rot patch (DIY-friendly):
- Cut out all the soft, crumbly wood with a chisel or utility knife. You want to get back to solid, dry wood — if it’s still soft, keep digging.
- Vacuum or brush out the dust.
- Mix two-part wood epoxy (like Abatron WoodEpox) according to the instructions.
- Press the epoxy into the cavity, slightly overfilling it because it doesn’t slump.
- Shape it roughly with a putty knife to match the jamb profile.
- Let it cure per the package (usually 2–4 hours).
- Sand smooth, prime, and paint.
When to call a pro: If rot goes more than a few inches up the jamb, or if the door is structural (exterior entry door that supports weight), call a carpenter. Frame rot in a load-bearing location can hide damage to the wall studs behind it.
Fix #4: Loose Strike Plate
The strike plate is the small metal plate on the jamb where the door latch clicks in. If the latch misses the hole, or the plate pulls away from the frame, the door won’t stay closed.
Quick fix:
- Remove the two screws holding the strike plate.
- Pack the holes with toothpicks and glue (same as the hinge fix above).
- Once dry, reattach the plate.
- If the latch still misses, the strike plate has shifted over time. Unscrew it, fill the original screw holes with wood filler, let it dry, sand smooth, then re-mount the plate 1/8" higher or lower so the latch seats correctly.
Painting and Finishing
After any of these repairs, the frame needs to be repainted or it will look worse than it did before. Two coats of matching paint, sanded lightly with 220-grit between coats, makes the repair disappear.
If you don’t know the original paint color, chip a small piece from a hidden spot (behind the hinge) and take it to any paint store for a match.
When the Whole Frame Needs Replacing
If the damage is more than half the jamb’s height, the door is sagging badly even after the hinge fix, or there’s visible structural movement in the wall — the frame itself is compromised. At that point, replacing the jamb (or the entire pre-hung door) becomes the practical move. A carpenter can usually do this in 2–3 hours and save you from chasing repairs on a frame that’s already lost its integrity.
Final Checklist
- Test the door: opens, closes, latches without forcing.
- Check the weatherstripping on exterior doors — disturbed by the repair?
- Touch up paint on the jamb so the repair disappears.
- For exterior doors: confirm the threshold still seals to the bottom of the door.
A door frame that swings square and latches cleanly is one of those small wins that makes a house feel solid. Most of these fixes are under $20 and under an hour.